


How to Create Android Application for your website/Blog in 5 Steps
Bangalore: Now a days Online marketing mainly turned into hand held devices Like mobile ,Tabs etc.
so most of the people are using android devices. Here we are going to help you by creating an android application of your blog or website. Most of the Websites and blog have separate mobile templates Once we Logged In/browse from Mobile it will change automatically into mobile view. There you can customize your page as per you web knowledge. Here we are Explaining How we can create an android Application. On click of this application It ill Open your web site in mobile view. No need to go for your Url. Just Install your application there users can browse in your website.

Step 1: Create a Simple Android Application using Eclipse IDE
If you have not set up the development environment.
Check this. Android Dev Envmnt Installation
If you have doubt in creating sample application check this Clcik
Step 2:Open Your res>Layout Folder and open the xml file.
and modify it like this.


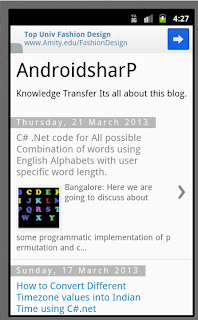
so most of the people are using android devices. Here we are going to help you by creating an android application of your blog or website. Most of the Websites and blog have separate mobile templates Once we Logged In/browse from Mobile it will change automatically into mobile view. There you can customize your page as per you web knowledge. Here we are Explaining How we can create an android Application. On click of this application It ill Open your web site in mobile view. No need to go for your Url. Just Install your application there users can browse in your website.

Step 1: Create a Simple Android Application using Eclipse IDE
If you have not set up the development environment.
Check this. Android Dev Envmnt Installation
If you have doubt in creating sample application check this Clcik
Step 2:Open Your res>Layout Folder and open the xml file.
and modify it like this.

Here In Linear Layout we have created a WebView because for Listing our Webiste we need to Call this webView. So we need to edit the res>values String.xml file like this.
There you can mention the Application Name what you want to display.

Step 3:Modify Your MainActivity.java Class Like this.
src>com.android.webapp>
your package name.

Its all basic java codes with android libraries. we have created webview object and given our Blog Url and loading it when our application launches.
You can customize it any way you want.
Step 4: Add this Internet accessing Permission code in your AndroidManifest.xml file.
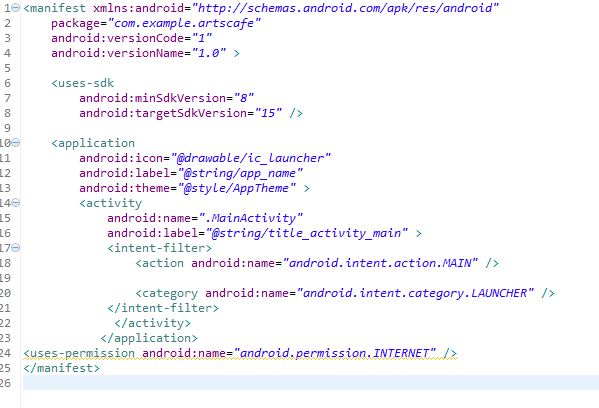
Run your application. It will launch your site in Emulator.

Step 5: Pull the .apk file and host it in google Play.
How to take APK File Check this link for Detals :Click me
If you have any doubt Comment Here


.jpg)
